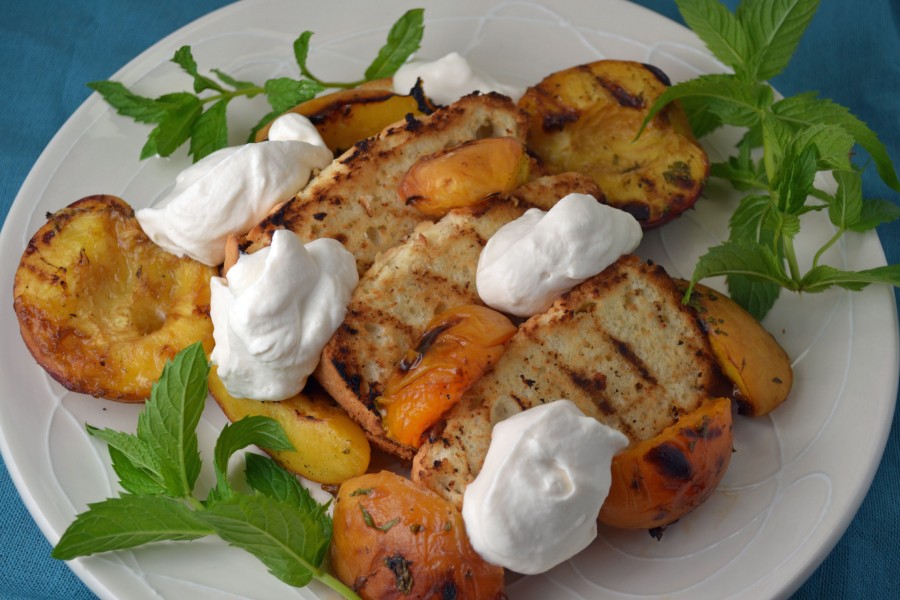
Grilled Princess Pound Cake and Peaches with Whipped Cream

Grilled Princess Pound Cake with Peaches

Grilled Princess Pound Cake with Roasted PeachesThis lengthy recipe title requires a bit of explanation. For starters, you may be wondering why this is a “princess” pound cake and not just a regular pound cake. I wish I could answer this question but it just so happens that “Princess Cake” is the title of this cake recipe in “The Art of Fine Baking.” In an introduction to this recipe, my grandmother mentions that this is a replacement for ordinary pound cake but why she calls it a Princess Cake remains a mystery. My guess is that it somehow refers to the light fluffiness of the cake, which is made with just egg whites and not yolks, like her regular pound cake recipe. I actually prefer the airiness of this cake to the more dense pound cake. It also works well in this strawberry shortcake-like dessert.

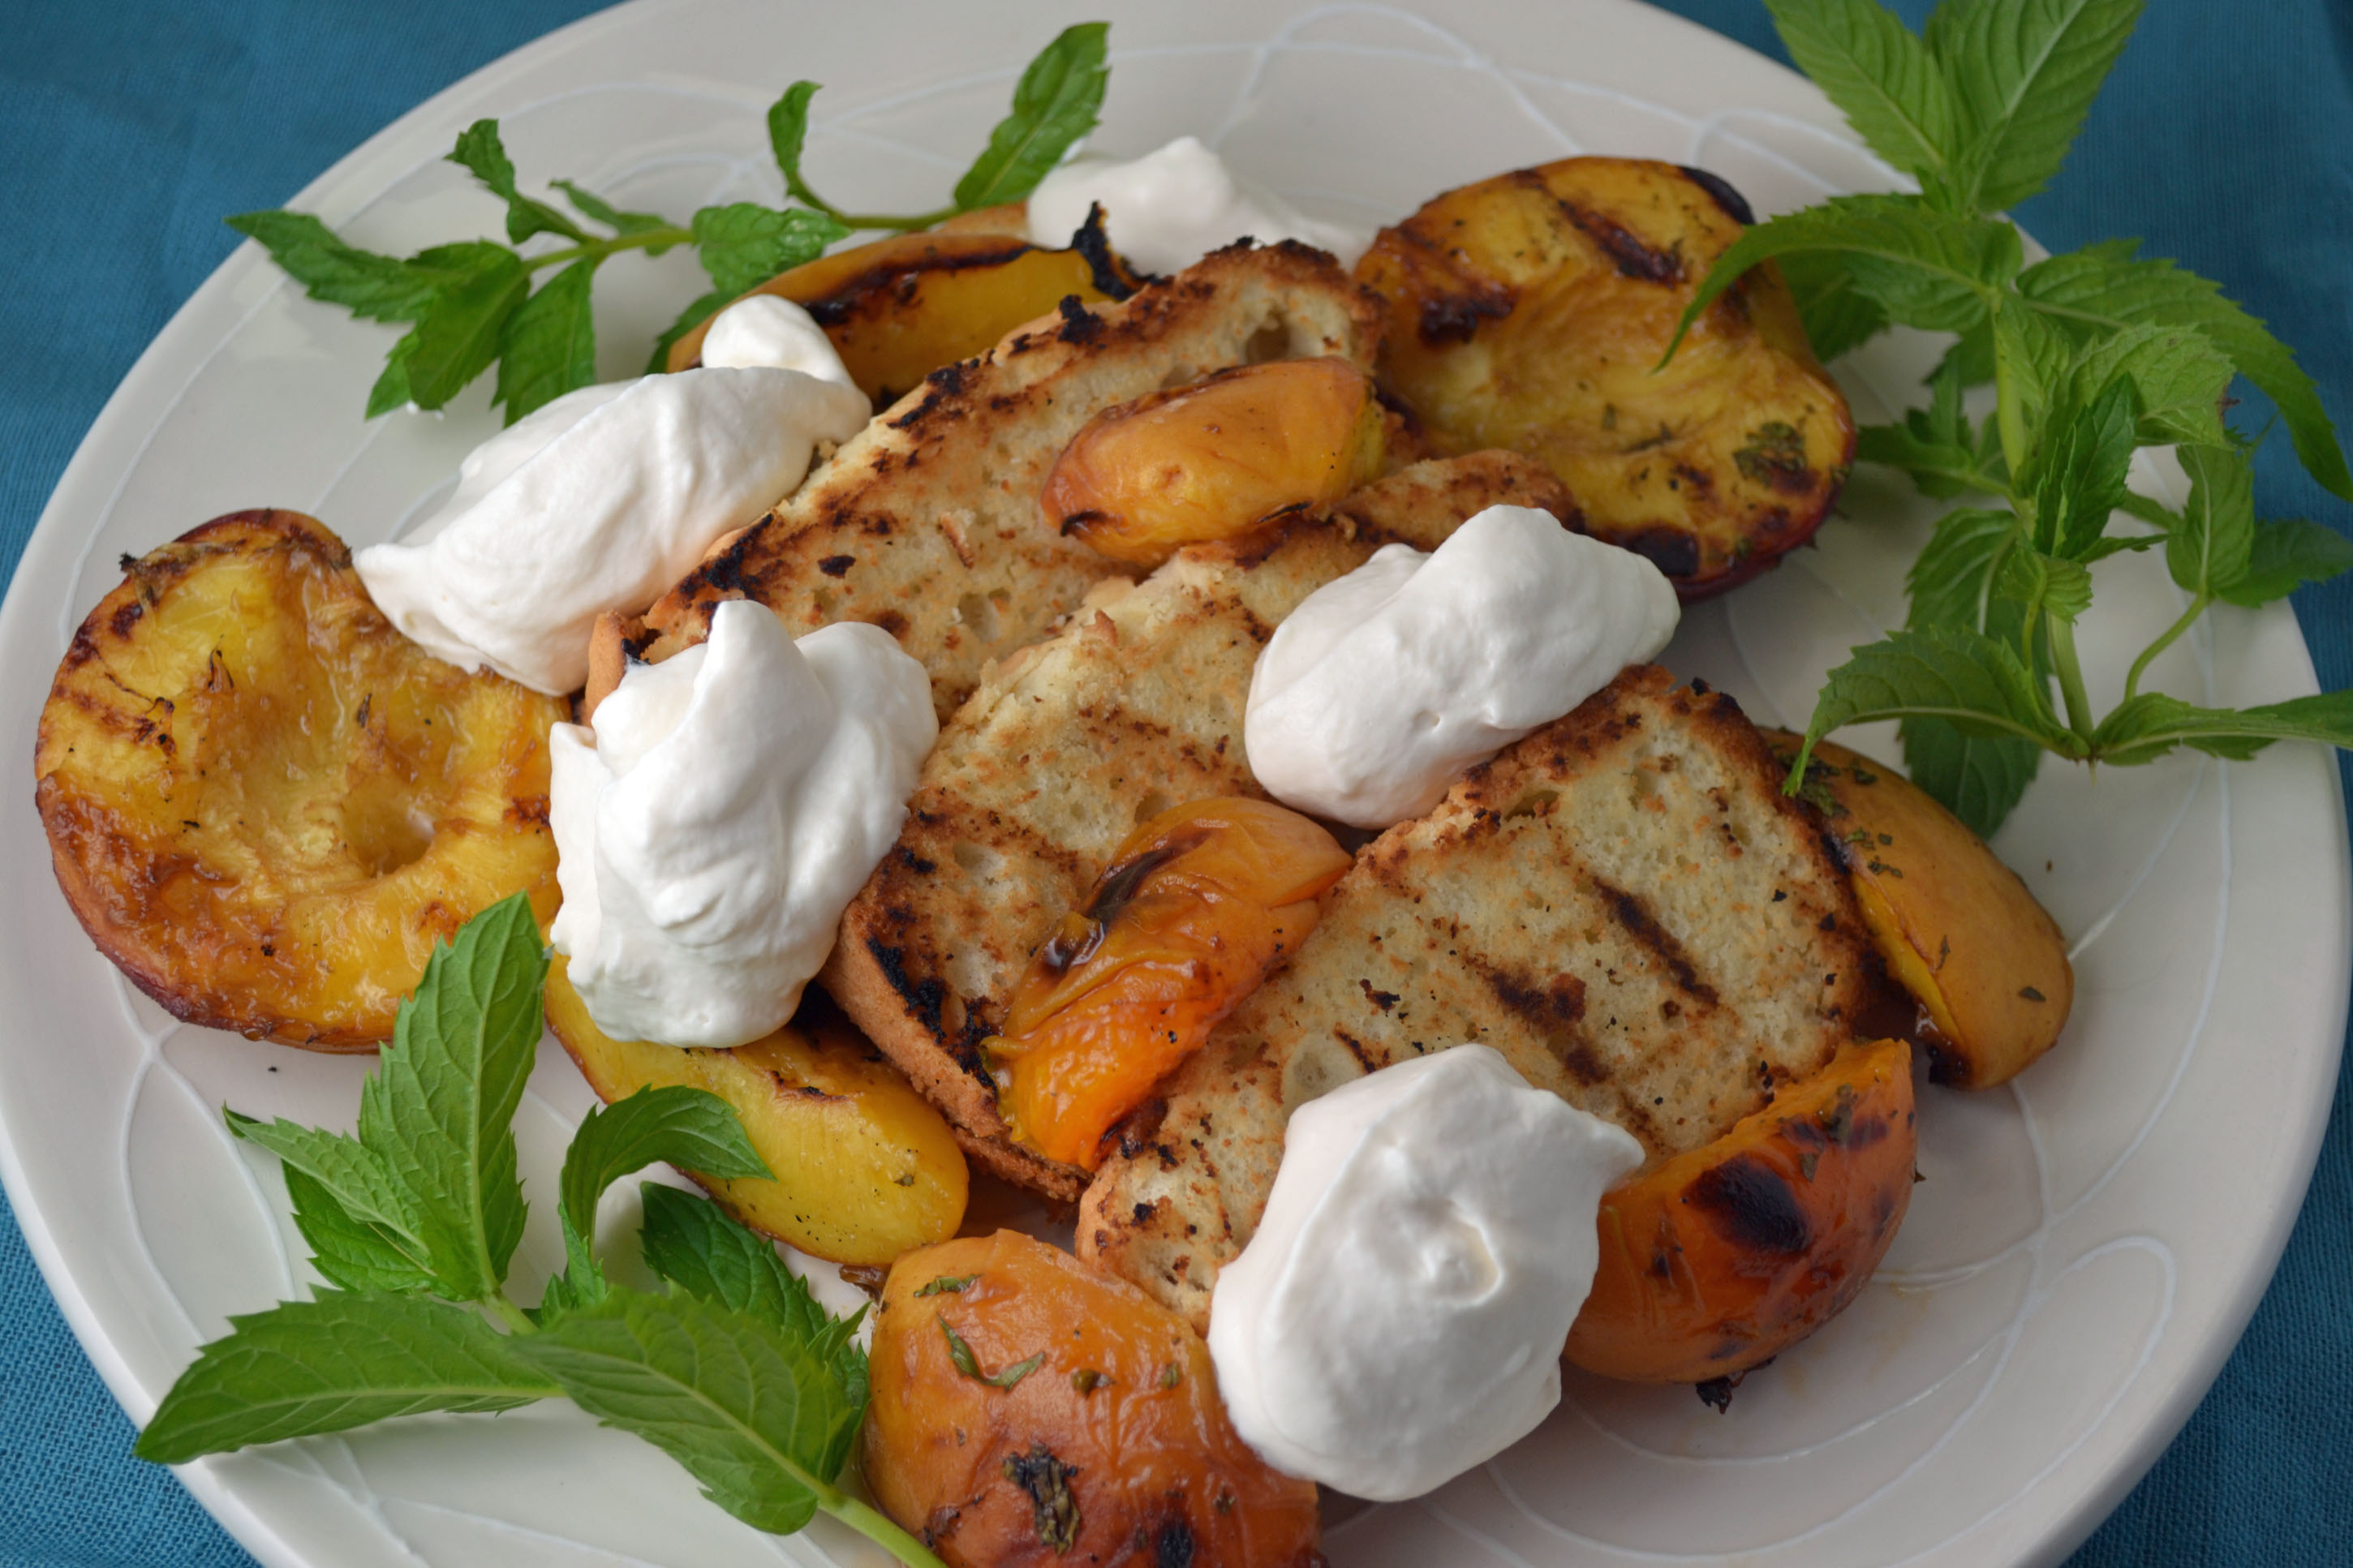
I tend to struggle to find summer recipes in both “The Art of Good Cooking” and “The Art of Fine Baking” as well as my grandmother’s unpublished recipes. This may be because she spent most summers traveling through France and eating at all the best restaurants (don’t we all wish we could?). The lack of what we now consider seasonal recipes, requires me to be a bit more creative. In this case, I wanted to take advantage of the sweet summer peaches (with a few apricots) that have premiered at the farmers markets and are becoming more prominently displayed. The simpler version of this dish is to just grill the peaches and serve over sliced pound cake with a dollop of whipped cream. Nothing wrong with that. I just decided to take it to the next level by grilling the pound cake and mixing the fruit with a little brown sugar, balsamic vinegar, and chopped mint. This marinade along with juices of fruit produce a caramelized sauce that drips off the fruit after it has been grilled and is delicious on the pound cake (which is basically toasted). It might be fancier to replace the whipped cream with mascarpone but the contrast of flavors and textures of the fruit and cake alone need nothing more than the lightness of sweetened whipped cream to bring it all together.

Ingredients:

Princess Pound Cake
1/2 cup butter
1 1/3 cup all purpose flour
1/2 teaspoon vanilla extract
4 large egg whites
pinch salt
1/8 teaspoon cream of tartar
3/4 cup sugar

1/2 cup heavy cream, whipped with 1-2 tablespoons sugar and 1/2 teaspoon vanilla
4-5 Grilled Peaches (or Apricots) – see note

Preheat oven to 350 degrees. Grease a 9 x 5 x 3 loaf pan and dust with flour.

Cream butter and half the flour until light and fluffy. Add vanilla.

Beat egg whites with salt and cream of tartar until they hold soft peaks. Add sugar, a tablespoon at a time, beating well after each addition. Beat whites at least 5 minutes or until they are very firm.

Quickly stir 1/4 of beaten egg whites into creamed butter-flour mixture. Pour mixture back over remaining egg whites. Fold genly together while sprinkling in remaining flour. Be careful not to overmix.

Pour into prepared pan. Bake about 45 minutes or until cake is golden brown and pulls away from the sides of the pan.

Note: For balsamic marinade, mix cut fruit with 2-3 tablespoons balsamic vinegar, 3-4 tablespoons brown sugar, and 1-2 tablespoons chopped mint. Measurements will depend on the sweetness of the fruit. Marinate for 15 minutes before grilling.

Yum

Blueberry Tart

Blueberry Tart | imPECKable Eats

Blueberry Tart

Fruit tarts are abundant in “The Art of Fine Baking.” They are some of the most seasonal recipes throughout the book and as the high season for blueberries approaches (though a bit late this year), it seemed like an obvious choice for this classy summer dessert. It’s also the only time of year that blueberries are affordable enough to make a whole tart full of them. Frozen just will not do and for those of us berry addicts, this tart is a delicious delivery method for these healthy bursts of juice.

We made a fair number of fresh fruit tarts with blueberries in culinary school, but none quite like this. In addition to my grandmother’s exceptional rich tart pastry dough (lemon zest and hard boiled egg yolks are key), a quick pseudo jam is made with half of the fresh blueberries and then combined with the remainder. This not only adds an additional layer of texture and flavor, but also a sweetness that can help balance out any berries that maybe slightly under ripe. With all this decadence, a layer of pastry cream maybe overkill. But I can’t seem to resist the urge to add the sweet cream with a touch of almond paste, even if only so that I can eat the leftovers with just a spoon. The star of the show though, remains the blueberry tart – with each ingredient perfectly distinguished in every bite.

Ingredients:

1 recipe rich tart pastry dough
4 cups blueberries
3/8 cup sugar
zest and juice of 1/2 a lemon
1/2 teaspoon cinnamon
1 recipe pastry cream (optional)

Grease a 9-inch tart ring and place on a baking sheet lined with parchment paper. Roll pastry dough an 1/8 inch thick and line tart ring. Chill.

Preheat oven to 350 degrees. Place chilled pastry in oven, taking it directly from freezer or refrigerator so it is as cold as possible. Prick bottom all over with a fork. Prick 3-4 times during first 10 minutes of baking to prevent bottom of pastry from puffing up. If sides of pastry should sink down during first 10 minutes of baking, simply press them back with a fork. Bake for a total of 25 minutes, or until shell is golden brown.

In a heavy saucepan, combine 1 1/2 cups blueberries, sugar, lemon zest and juice, and cinnamon. Cook over low heat, stirring until sugar is dissolved. Raise heat and boil rapidly about 8 minutes or until blueberries thicken and acquire the consistency of jam. Cool.

Combine raw blueberries with cooked jam, mixing gently. Spread a thin layer of pastry cream (if using) on the bottom of the baked tart shell. Combine raw blueberries with cooled jam, mixing gently. Spoon into tart shell.

Adapted from “The Art of Fine Baking,” by Paula Peck

Yum

Two-Toned Coleslaw

Two Toned Cole Slaw

Two-Toned Cole Slaw

As the quintessential picnic and BBQ salad, coleslaw is member of that famous family of American mayo salads. It often goes unnoticed, flying under the radar, a dull salad that always seems to stick around. Coleslaw remains a popular side but you almost never hear “ooh a side of coleslaw would be perfect with this” or “I’m craving coleslaw with my hamburger.” It’s usually more of a last minute thought, often an impulse buy to a fill that extra space on your plate of BBQ ribs.

Needless to say, I wasn’t exactly excited when I came across the my grandmothers unpublished recipe for two-toned coleslaw. I almost skipped right over it. When I started to read the ingredients though, it occurred to me that this was an actual salad and not the sugary bland mush of a slaw I was used to. In addition to the cabbage and carrots, this slaw has freshly sliced cucumber, celery, green bell pepper, and scallion. The contrast between the vegetables made this coleslaw worth a shot. It’s not even necessary to make the mayo for the dressing from scratch (for those of you concerned about eating raw eggs). But it does give it a nice richness that’s worth the extra work. With this old fashioned slaw all dressed up, it finally deserves that prominent salad spot at the picnic table.

Ingredients:

3 cups shredded green cabbage
3 cups shredded red cabbage
2/3 cup finely sliced celery
1/2 cup sliced cucumber (peeled and seeded)
1/2 cups chopped green pepper
1/2 cup shredded carrot
1/4 cup sliced scallions
1/2 teaspoon celery seed
1 cup homemade mayonnaise
1 tablespoon sugar
1/4 cup cider vinegar

Combine all vegetables and celery seed in a bowl. Toss to mix thoroughly.

In a separate bowl, combine mayonnaise, sugar, and half the vinegar. Taste for seasoning and add remaining vinegar and additional sugar if needed. Pour dressing over cabbage mixture. Mix together thoroughly. Chill for at least an hour before using.

Serves 6.

Yum

Old Fashioned Cheesecake (strawberries optional)

Old Fashioned Cheesecake

Old Fashioned Cheesecake

There’s a lot to say about cheesecake but very little that’s really necessary. I was surprised to find this old fashioned cheesecake recipe in “The Art of Fine Baking.” It’s not one of my grandmothers well-known recipes and seemed a bit out of place amongst the fancy tortes and cakes. As summer approached, I decided I would try this basic recipe and top it with the fresh strawberries that are now in season and grown locally. My only issue was that the original recipe called for “Zwieback” crackers in the crust. I had no idea what these were and not only did they sound a bit ancient to me, I almost thought they were made up (my grandmother’s maiden name was Zweier, an unlikely coincidence). After a little research, I discovered that Zwieback crackers was a cracker toast often marketed by Gerber and Nabisco as a baby biscuit. It appears that these were discontinued about 4-5 years ago. There are a few homemade recipe versions available online but I opted to replace the Zwieback crackers with good old graham crackers. Since ground pecans or walnuts make up half the crust, the graham crackers don’t take away from the crust’s integrity. That unique rich nutty flavor still gives this old fashioned cheesecake that little special Paula Peck spin.

Note: The baking instructions below have been modified from the original recipe. If a crack-free cheesecake is preferred, bake the cheesecake in a water bath which will allow it to bake more slowly. Simply place the spring-form pan in tin foil and ensure foil is folded up the sides (this protects the cake from any water that could leak through). Pour hot water around the foil lined cheesecake.

Ingredients:

1 package Graham Crackers, made into crumbs (or Zwieback!)
1 cup finely grated walnuts or pecans
1/3 cup butter, melted
1 cup granulated sugar
1 1/4 lbs soft cream cheese
1/4 teaspoon salt
1 1/2 teaspoons vanilla extract
1 teaspoon lemon zest
4 eggs, separated
1 cup heavy cream, whipped
1/2 cup sifted flour

Strawberry Topping
1 lb strawberries, hulled and sliced
1/4 sugar

Preheat oven to 325 degrees. Lightly grease the bottom and sides of a 9-inch spring-form pan. Combine graham cracker crumbs, grated nuts, melted butter, and 2 tablespoons sugar. Mix with fingertips until ingredients are blended. Spread the crumb mixture on the bottom of the spring-form pan. Press down firmly.

Mix the cream cheese with half the remaining sugar, salt, vanilla, and lemon zest. Beat in egg yolks. Beat egg whites until they hold soft peaks. Add the remaining sugar a tablespoon at a time, beating well after each addition. Beat until very firm. Pour whipped cream on top of stiffly beaten egg whites. Add cream cheese mixture and sprinkle flour on top. Fold together gently.

Pour in prepared pan and back for 45-60 minutes or until cheesecake is firm but still slightly jiggly in the center. Remove from oven and allow to cool 30-60 minutes before chilling fully in the refrigerator.

While cheesecake is chilling, make strawberry topping by combining sugar with the strawberries. Cover and chill for at least 1 hour.

Spoon strawberry topping over chilled cheesecake right before serving.

Adapted from “The Art of Fine Baking”

Yum

Vegetable Frittata

Vegetable Frittata

Vegetable FrittataThere are a couple different ways to make a vegetable frittata. You can put it straight into the oven casserole style, or you can start it on the stove and move it to the oven. Either way produces that delicious eggy goodness. In this unpublished Paula Peck recipe, the oven only approach is suggested. However, I found that the stove-to-oven method works equally well here and allows for a one pot meal (so to speak).  Just saute the veggies in an a large oven proof saute pan and once soft, add the eggs. When the eggs begin to set, drizzle a little olive oil around the edge (this is optional but helps reduce sticking) and put it in the oven.

Just like the cooking method, the selection of vegetables can also vary. Local asparagus is abundant right now so this seemed like an obvious choice. Broccoli, green beans, potato, tomato, or even cauliflower would be tasty as well. With just a few substitutes, this regular vegetable frittata can become a fancy “Spring” or “Summer” frittata – ready for its brunch debut.

Ingredients:

2lbs small zucchini cut a bit less than 1/4″ thick
3 tablespoons olive oil
1 cup thinly sliced celery (or asparagus cut in 1/2″ pieces)
1 cup sliced green pepper
1 cup green onion, chopped
2 cloves garlic, finely minced
8 eggs
1 teaspoon salt
1/2 teaspoon white pepper
1/2 teaspoon thyme
1/4 cup heavy cream
3/4 cup parmesan cheese

Preheat oven to 325 degrees. Heat oil in a large skillet. Add zucchini and asparagus (if using). Saute, turning frequently until golden and tender.

Grease a 9 inch ceramic dish or its equivalent. Combine celery (if using), green peppers, onions, and garlic. Place a third of the mixture on the bottom of greased dish. Sprinkle with salt and pepper. Make a layer of sauteed zucchini on top, then another layer of vegetables, seasoning, and finally another of sauteed zucchini.

Beat eggs, adding cream, Parmesan, thyme, salt, and pepper. Pour over vegetables. Bake  for 30-45 minutes or until egg is set. Cut into wedges to serve.

Serves 5-6


Yum

1 18 19 20 21 22 33