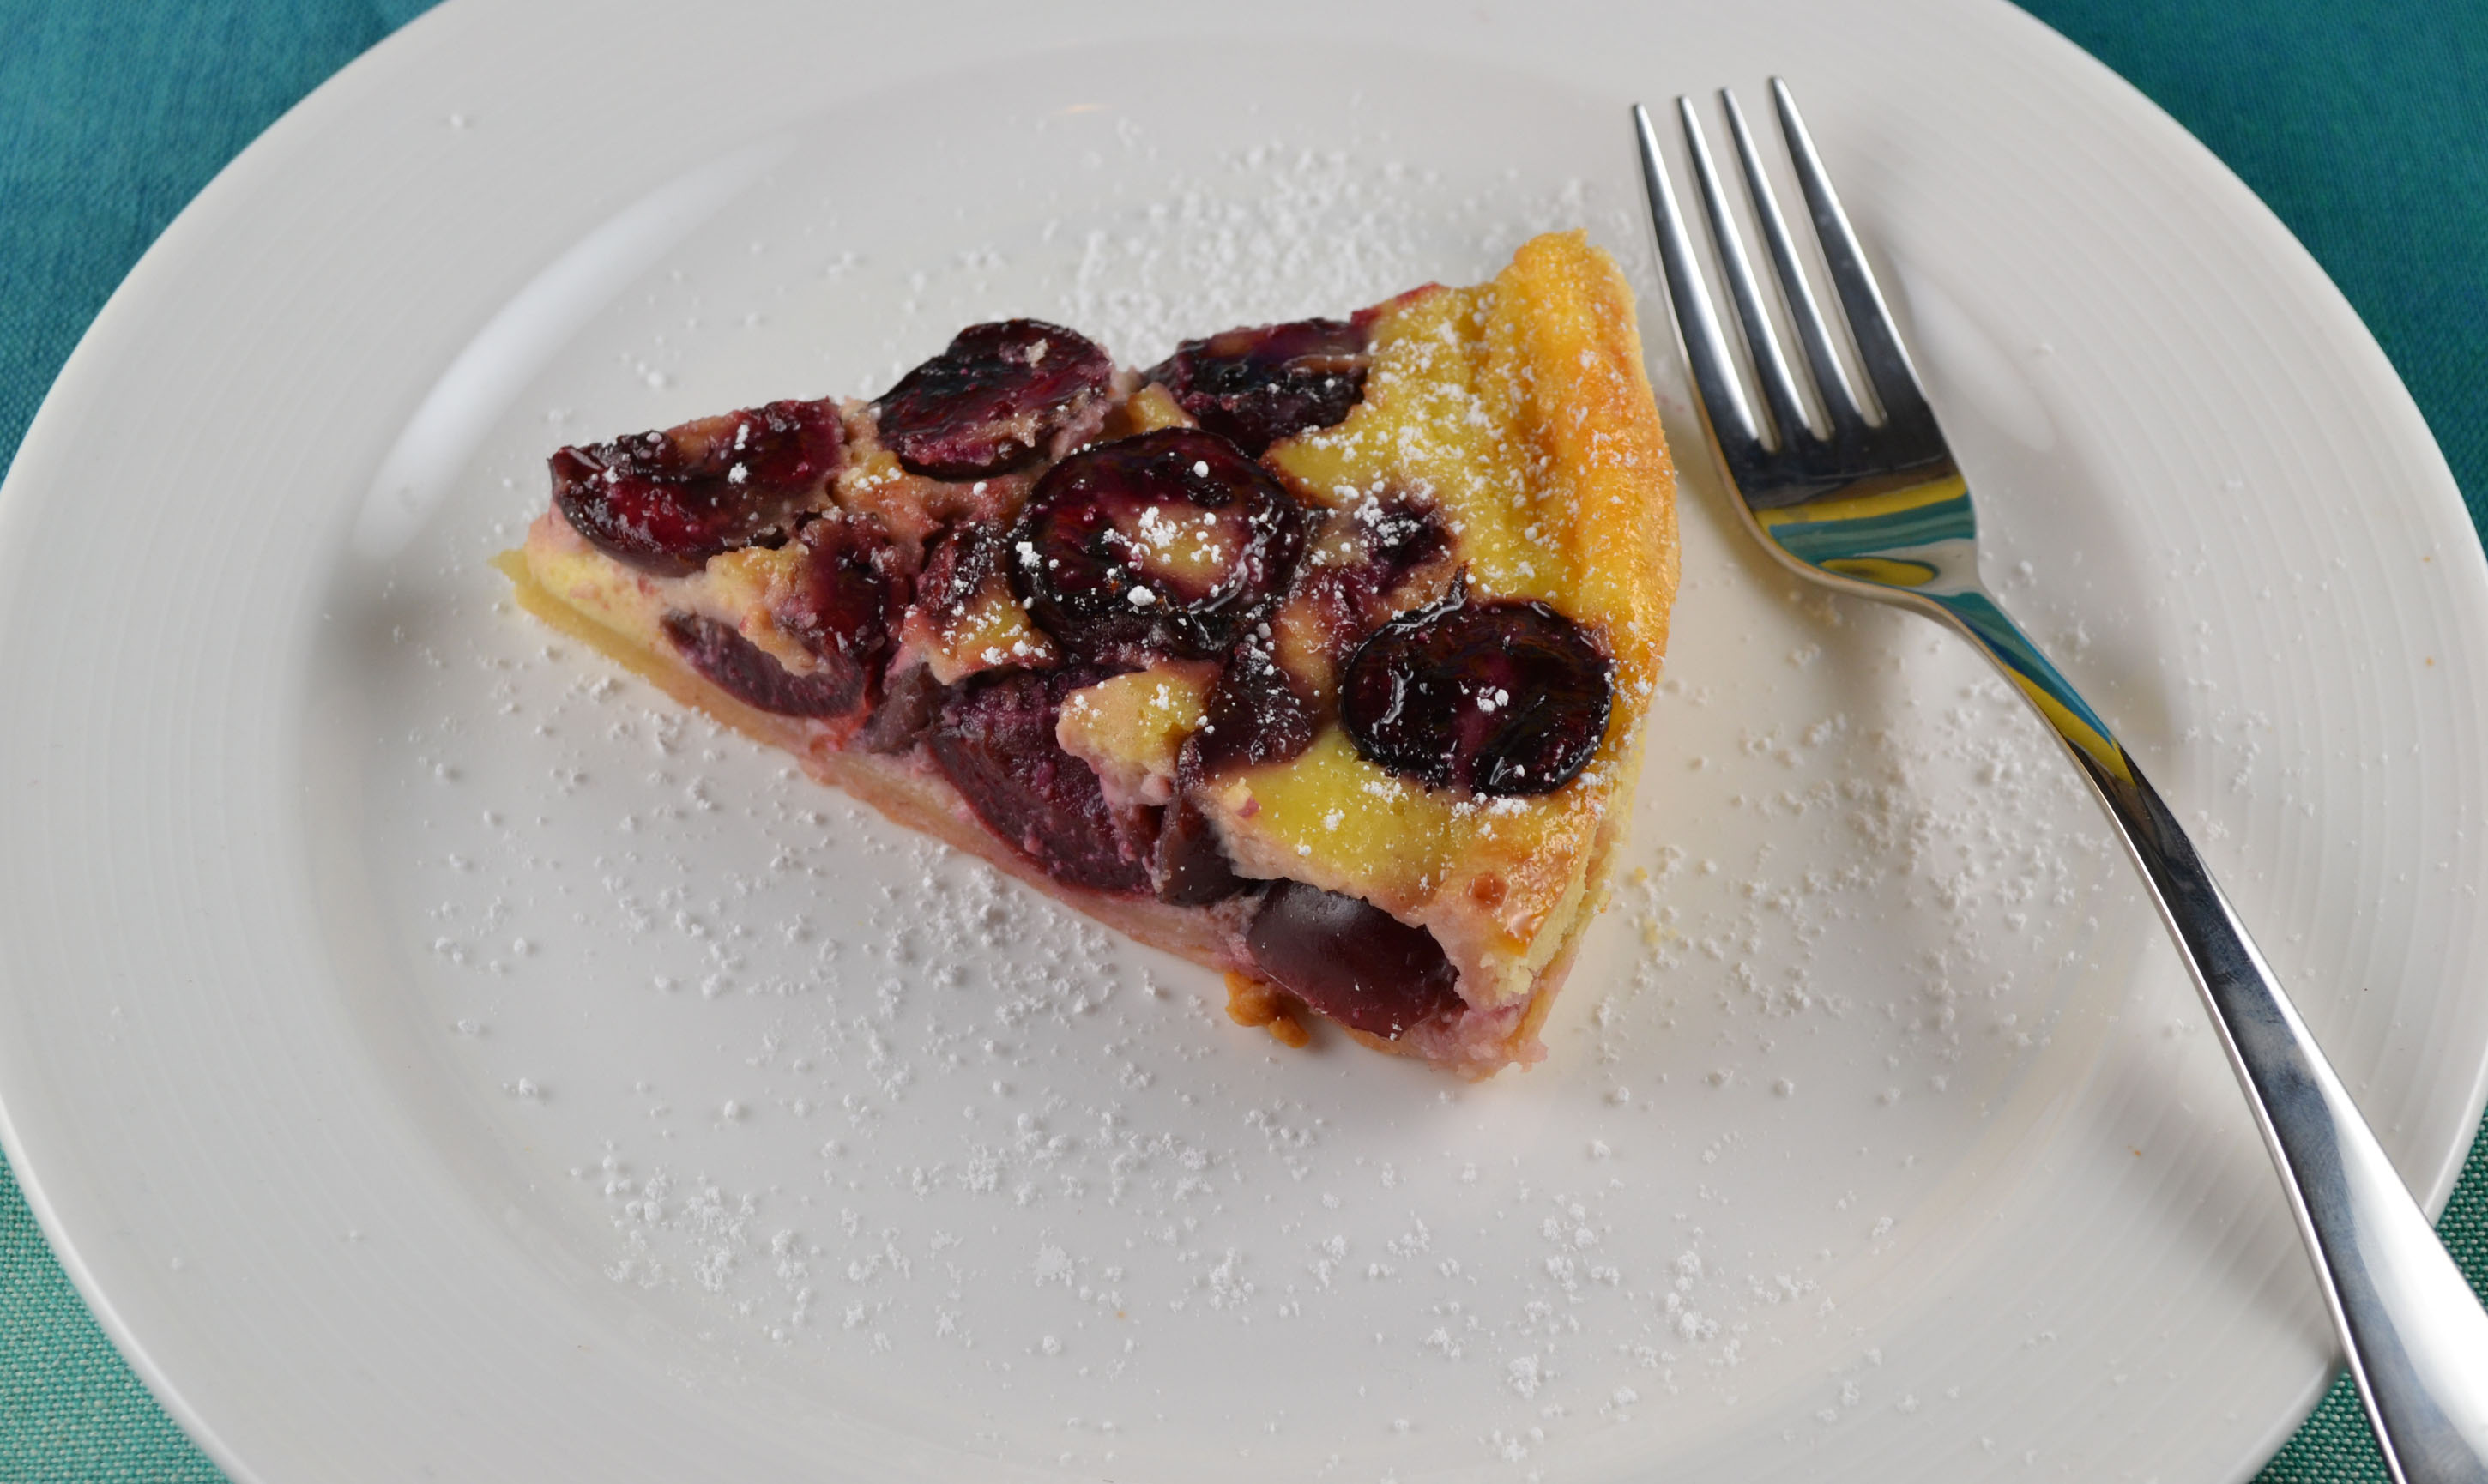
Sour Cream Custard Cherry Tart
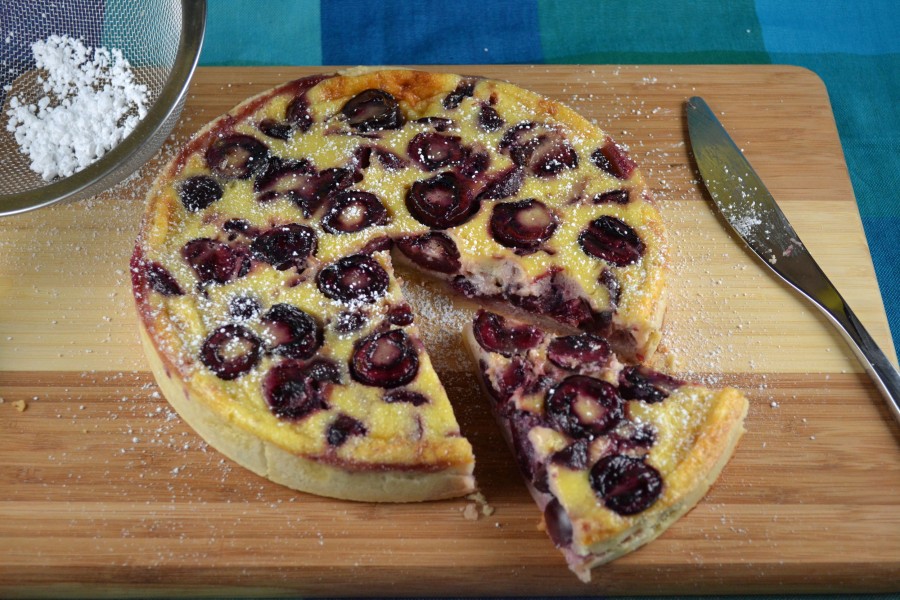
Like the many cake recipes in “The Art of Fine Baking,” I’ve barely scratched the surface of the tart recipes. Now that summer berries are on the horizon, you will see more tarts from me soon. So simple in flavor, tarts are a lovely (and classy!) way to emphasize fresh seasonal fruit. When I started seeing cherries at the fruit stands on the streets here in NYC a few weeks ago, I was inspired to make this easy Sour Cream Custard Cherry Tart. The only time consuming part of this recipe is pitting the cherries. Sometimes I still think my fingers may be a little too pink.
I prefer to make the tart shell from scratch. My grandmother’s rich tart pastry recipe is exceptional (especially the lemon zest) but to further simplify this recipe, a store bought shell can be used. The star of this tart is really the cherries (not the custard), so make sure to use fresh sweet ones. Frozen or canned will ruin both the texture and taste of the tart. Cherry fans are sure to appreciate this elegant end to that first summery meal.
Ingredients:
1 recipe rich tart pastry
3 eggs
1/3 cup sugar
3/4 cup sour cream
1/2 teaspoon vanilla extract
2 cups pitted sweet cherries
Line a 9-inch tart ring with rich tart pastry. Chill, preferably in the freezer, for at least 1 hour. Preheat oven to 350 degrees.
Beat eggs with sugar, sour cream, and vanilla. Arrange pitted cherries in unbaked tart shell. Pour egg mixture over them. Bake about 45 minutes on the lowest rack of the oven, or until the custard is firm and the tart is brown. Serve chilled.
Adapted from “The Art of Fine Baking,” by Paula Peck.