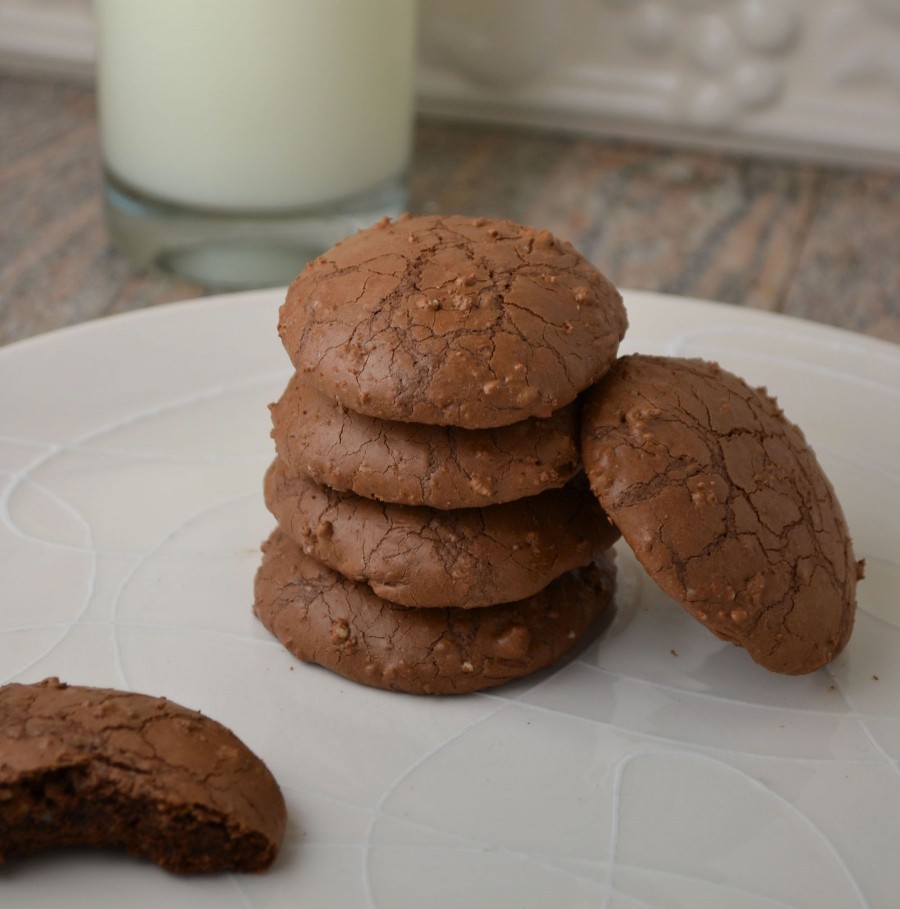
Polish Butter Cookies (Autumn Version)

Polish Butter Cookies

Polish Butter Cookies
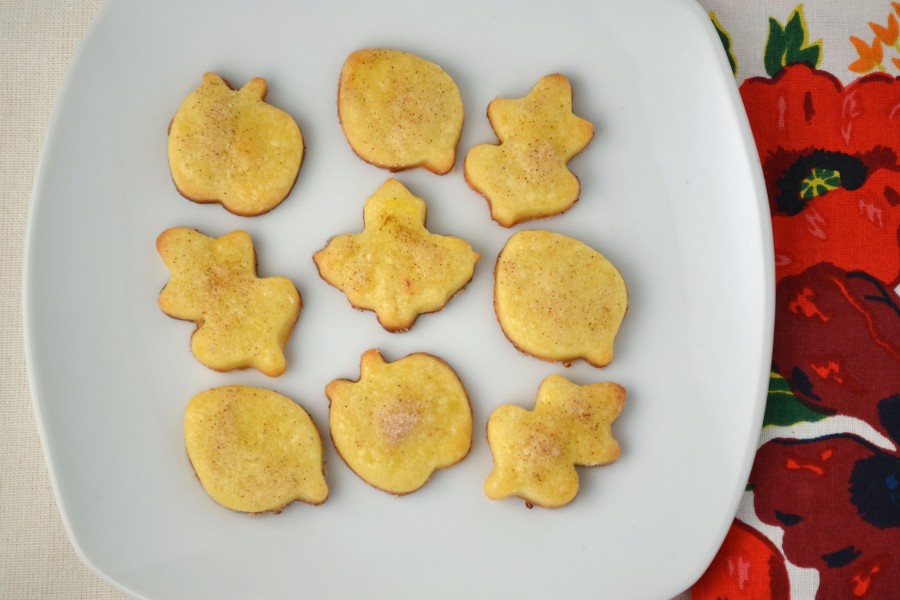
I like to think of these as cut-out cookies for adults. They can be for kids too (perhaps the cookie shapes seem more childlike) but the buttery flavor is what differentiates these from those regular sugar cookies, often topped with bright colored sprinkles. It’s also the hardboiled egg yolks that bring out the richness in these sweet bites. My grandmother used this technique in many of her recipes for cookies and tarts. It may sound odd at first, to push a hardboiled egg through a sieve, but it adds a depth of flavor to the dough that is unlike anything else.

This recipe was originally brought to my attention by a reader who previously owned my grandmothers book, “The Art of Fine Baking.” Hidden in the cookie section, I had scanned over this recipe a number of times but wasn’t particularly inspired to try it. I’m glad I finally did. It is a versatile recipe that is so simple and basic, it can be used for a number of different occasions. The shapes of the cookies can vary from cutout stars and crescents, to Holiday specific ones such as witch’s hats for Halloween or gingerbread boys for Christmas. I chose these cute little fall shapes because they seemed appropriate for the chilly autumn weather and falling leaves.

The toppings are also up to you. My grandmother recommends cinnamon sugar or poppy seeds. I will eat cinnamon sugar on almost anything so this was a natural choice for me but poppy seeds, chopped nuts, or even those different colored sprinkles (if making them with kids) would be tasty as well. You will be surprised how something as simple as little butter cookie cut-outs will disappear so quickly from the kitchen counter (especially if you accidentally toss half of them on the floor like I did – oops). Good thing it’s a large recipe!

Ingredients:

1 cup unsalted butter
3/4 cup sugar
5 hardboiled egg yolks, pushed through a sieve
1 teaspoon vanilla extract
2 cups sifted all purpose flour
1/2 teaspoon salt
1 whole egg mixed with
1 teaspoon milk

Toppings:
cinnamon sugar
finely chopped nuts
poppy seeds

Cream butter and sugar. Stir in sieved hardboiled egg yolks, vanilla, and then flour mixed with salt. Chill dough for 1 hour.

Preheat oven to 350 degrees and lightly grease or line a baking sheet with parchment paper.

Flour counter top or work surface. Roll out cookie dough 1/4 inch thick. Cut cookies with cookie cutters into small crescents, stars, or other shapes. Transfer to a cookie sheet, leaving about an inch between cookies. Brush with beaten egg and milk mixture. Sprinkle with toppings of your choice. Bake about 8-10 minutes or until cookies are lightly browned.

Yield approximately 48 cookies

Adapted from “The Art of Fine Baking,” by Paula Peck

Autumn Polish Butter Cookies

Yum

Cats Tongue Cookies

Cats Tongue Cookies Langue du Chat

It’s funny how a simple butter cookie can inspire such nostalgic memories. As a child, Cats’ Tongues or Langues du Chat was one of the first recipes I tried from “The Art of Fine Baking.” Although I enjoyed piping the buttery dough onto baking sheets, I didn’t really understand this plain cookie. Perhaps my taste buds were too accustomed to the corn syrup filled treats that were so readily available. Or maybe I just didn’t try these delicious little bites while they were still hot and fresh from the oven (by far the best time to eat them). Whatever the reason, it wasn’t until my father shared his memories of my grandmother making them that I really began to enjoy and appreciate this simple sweet treat. However, the addition of chocolate didn’t hurt either.

Cats’ tongues cookies were the go-to cookie in Paula Peck’s kitchen. She would often make them for my father and uncle, who as children, eagerly watched as she piped the skinny pencil thin drops of dough onto a baking sheet. Fascinated with the pastry bag, my father often begged to try it and on the occasion that my grandmother relented, he promptly made a big mess of cookie dough and whatever baking sheet or other kitchen equipment/utensils it came in contact with. Once the cookies finally made it out of the oven, they were consumed by fist full.

After whipping up a batch of these in under 30 minutes, I now see why they were a popular treat in my grandmother’s kitchen. Not only are they easy to make, it’s hard to stop eating them. This recipe is fairly large and can be easily halved but if you don’t finish them while fresh and hot, dip the cooled cookies in chocolate. The chocolate adds a twist to the original plain cookie, making these buttery delights irresistible to all of us choco-holics.

Ingredients:

1/2 cup sugar
1/2 cup butter
3 egg whites
1 cup sifted flour
pinch salt
1/2 teaspoon vanilla extract
melted chocolate for dipping (optional)

Preheat oven to 400 degrees. Grease and flour baking sheets or line with parchment paper.

Cream butter and sugar. Beat in egg whites, a little at a time, beating well after each addition. Fold in flour, salt, and vanilla. Fit a pastry bag with a large star tube and fill bag with 2/3 of the cookie batter. On prepared baking sheets, pipe pencils of batter about 2 inches long. Leave one inch between cookies for spreading.

Bake about 7 minutes or until edges of cookies are golden brown. Centers should remain light. Remove cookies from baking sheets at once. Once cool, dip in melted chocolate (if using).

Yield approximately 50

Cats Tongues

Yum

Palmiers

Palmiers

Palmiers by Paula Peck

Sometimes I think my grandmother should have written a book called “101 things to do with puff pastry.” There are at least 20 recipes in “The Art of Find Baking” alone that use this buttery flaky dough. Also known as the elephant ear or palm tree, the classic French Palmier is more versatile than you may think. Instead of rolling the dough in just plain sugar, cinnamon sugar can be used for extra spice.  By folding the dough into the more traditional palmier shape (versus the four-finger), these pastries look similar to a heart and are the perfect accompaniment for that morning cup of coffee on Valentines day.  It may be a bit of a stretch but if Parmesan cheese is used instead of sugar (a far less traditional ingredient), these turn into a delicious game day appetizer for the super bowl. Who knew these simple pastries had so many uses?

The key to a delicious palmier is to make them yourself and eat them fresh. Those sad boxed palmiers you see at the grocery store do not do them justice. Most of us don’t have time for the lengthy process of making puff pastry so store bought puff pastry may be used. As long as you bake them yourself, these snack-worthy pastries will be much better than the often stale, pre-made ones. Since rolling and folding the dough into the palmiers shape may seem daunting or even confusing, I have included the below illustration from “The Art of Fine Baking.” For those of you who are not familiar with this baking book, it’s full of these charming old fashioned illustrations and this one in particular is actually quite helpful. So the next time you have extra puff pastry or are looking for a fun, easy snack – give palmiers a chance. You may be surprised how much you like them.

Ingredients:

Puff Pastry recipe
granulated sugar, cinnamon sugar, or grated Parmesan cheese

Roll out puff pastry in sugar to make a long strip ten inches wide and 1/8 inch thick (if using cheese instead of sugar, roll out pastry in flour). Sprinkle with sugar (or cheese). Determine the center of the strip. Fold each long side inward into thirds, so that two folded halves meet exactly in the center. Then fold halves together to make a compact 6-layer roll. Coat with additional sugar or cheese. Wrap in wax paper and chill for 1 hour.

Palmiers Folding Instructions

Preheat oven to 350 degrees. Cut roll into 1/4 inch slices. Place well apart on ungreased baking sheet. Spread the two halves of each slice slightly so they can expand while baking. Bake about 30 minutes, turning slices over once with a spatula after 25 minutes. Bake until golden brown.

Yum

Crackled Chocolate Drops

Crackled Chocolate Drops

Chocolate Crackled Drops

A simple chocolate cookie can be the perfect crave-worthy treat. Using ingredients you probably already have on hand, these Crackled Chocolate Drops are quick, easy, and best of all chocolaty. I still get excited about making recipes by my grandmother that contain chocolate. With the number of recipes in “The Art of Fine Baking,” the chocolate ones are surprisingly few and far between. Much of her baking from the early 1960’s was European inspired. Classics like Genoise, French-style Fruit Tarts, Strudel, and Danish Pastry allowed little room for chocolate. Also, chocolate with varying degrees of cocoa butter content were not nearly as accessible at the time as they are now. I like to think that as the popularity of chocolate and its availability grew, my grandmother would have eventually come up with a book full of chocolate recipes to die for. Her Brownie recipe has always been a favorite and in my opinion these crackled chocolate cookies aren’t far behind.

The majority of this recipe is just chocolate and ground almonds. The original recipe called for grated almonds, which most of us don’t have time for. If you prefer a lighter, fluffier cookie and your purse strings are a bit looser, you can use Almond flour. The high egg yolk content then keeps the center of the cookie moist and chocolaty. As the smell of melted chocolate and almonds permeates your kitchen, these crackled drop cookies will barely make it out of the oven before they’re half gone.

Ingredients:

8 oz semisweet chocolate
8 egg yolks
1/2 cup sugar
1 teaspoon vanilla extract
1 cup ground almonds or almond flour
7/8 cup sifted flour pinch of salt

Preheat oven at 350 degrees. Grease and flour a baking sheet (or line with parchment paper).

Melt chocolate over over a double boiler. While chocolate is melting, beat egg yolks and sugar together until light and fluffy. Add vanilla. Stir in melted chocolate, grated almonds, and flour mixed with salt.

Drop or pipe small rounds of batter on prepared cookie sheet, leaving 1 inch between cookies. Bake about 25 minutes, or until cookies are crackled and dry.

Yield: about 30

Adapted from “The Art of Fine Baking,” by Paula Peck.

Yum

Florentines

Florentines

Paula Peck's Florentines

I’m no expert in making Florentines but it’s hard to go wrong with these gooey chewy chocolate dipped cookies. I realize they should probably be crispier, thinner, maybe rounder, and more even. But I’m not complaining. A cookie recipe that my father remembers my grandmother making, he confirmed that these turned out how she intended. Candied orange peel is the special ingredient that makes these different from many Florentine recipes that use grated orange zest. It maybe a little harder to find, but candied orange peel is what will definitely win over those orange-chocolate lovers. Not a orange-chocolate fan (I’m not particularly crazy about it myself)? Try candied ginger and you’ll have a whole different cookie.

A note about this recipe: those of you who are foolish ambitious enough to try to replace the shortening in this recipe with coconut oil, feel free but just make sure you use a very a mild one. Otherwise, the results are..lets just say, less than ideal. I would recommend skipping the shortening all together and just using melted chocolate as is.

Ingredients:

1/2 cup sugar
1/3 cup heavy cream
1/3 cup honey
2 tablespoons unsalted butter
1/4 cup candied orange peel, finely chopped
1/2 cup sliced almonds
3 tablespoons sifted flour
8 ounces semisweet chocolate, chopped
1 tablespoon vegetable shortening

Preheat oven to 400 degrees. Grease baking sheets well.

Combine sugar, cream, honey, and butter in a heavy saucepan. Stir over low heat until sugar is dissolved. Raise heat and boil without stirring until soft-ball stage (a ball forms when a bit of mixture is dropped into cold water) or until mixture registers 238 degrees on a candy thermometer. Cool slightly.

Stir in orange peel, nuts, and flour. Drop small rounds of batter on the prepared cookie sheets, leaving at least 2 inches between each cookie. Flatten each cookie with a fork dipped in milk (if necessary). Bake 8-10 minutes or until cookies are golden brown. They will spread while baking. Therefore, immediately upon removing them from the oven, pull each one back into the shape of the round with a greased 3-inch cookie cutter. Using a cutter will ensure their final roundness.

When cookies are firm, remove from cookie sheet and finish cooling on a rack. Melt chocolate in a double boiler. Stir in shortening. Coat underside of each cookie thinly with melted chocolate. Place in refrigerator long enough to set chocolate.

Yield: approximately 16

Adapted from “The Art of Fine Baking,” by Paula Peck

Florentines

Yum

1 2